
Have a passion you want to share? Simply love to write? Need a way to document your travels? Maybe you’re looking for a way to earn a passive income online? Either way, starting a blog could be exactly what you need.

Over the years, blogs have popped up everywhere thanks to the blogging platforms that make it so easy. You don’t need to be a competent writer, nor do you need to be tech savvy. You just need to simply make one and get going.
Unfortunately, some people have a desire to start a blog but have no clue where to start. It seems complicated and complex and many give up on the idea before giving it a real shot.
I’m here to tell you it’s not hard! If I can do it, then anyone can.
After setting up my blog and making many mistakes in the process, I have collated my knowledge into 7 Easy Steps to not only set up your own blog, but to have it up and running by the time you finish a cup of tea!

I’ve made this straightforward and easy so you can avoid any dead-ends and mistakes that I made.
NOTE: I personally use WordPress as do the majority of people, including serious bloggers. One thing that I found confusing with WordPress was the difference between wordpress.COM and wordpress.ORG. Basically, it’s the difference between having a hosted (com) or self-hosted (org) blog. So I tried out both…
The verdict: Use wordpress.com if you’re just wanting a blog to share with your family and friends. Use wordpress.org if you wish to have a blog that gives you flexibility and customisation abilities. Also choose this option if you’re wishing to earn an income from your blog further down the track.
The steps below are for those wishing to create a blog using Wordpress.org:
Step #1: Choose Your Brand Wisely
This step is often left out from other ‘How to create a blog’ articles. But in my opinion, it’s one of the most important steps. Take your time to brainstorm the perfect name for your blog. This will become your brand. People should be able to read the name and gather an understanding of what you’re about.
You’ll also want a name that doesn’t trap you in a box for the long-term. What’s a brand name you will be happy to continue using a year from now? Two years from now?
What’s a tagline you can use?
Step #2: Set Up Hosting And A Domain
Think of hosting as a computer in the cloud where you can install WordPress. You don’t install it on your own computer.
After a lot of research, I recommend and personally use Bluehost as a hosting provider because:
- Large and widely used/known
- 24/7 helpful customer service
- Affordable – Readers can get hosting + a free domain from $3.95/month
- Fast loading
- IT’S EASY TO USE
So here’s how you go about getting your hosting set up (these steps are for those wishing to use Bluehost):
a) Go on over to Bluehost and click the green ‘Get Started Now’ button.

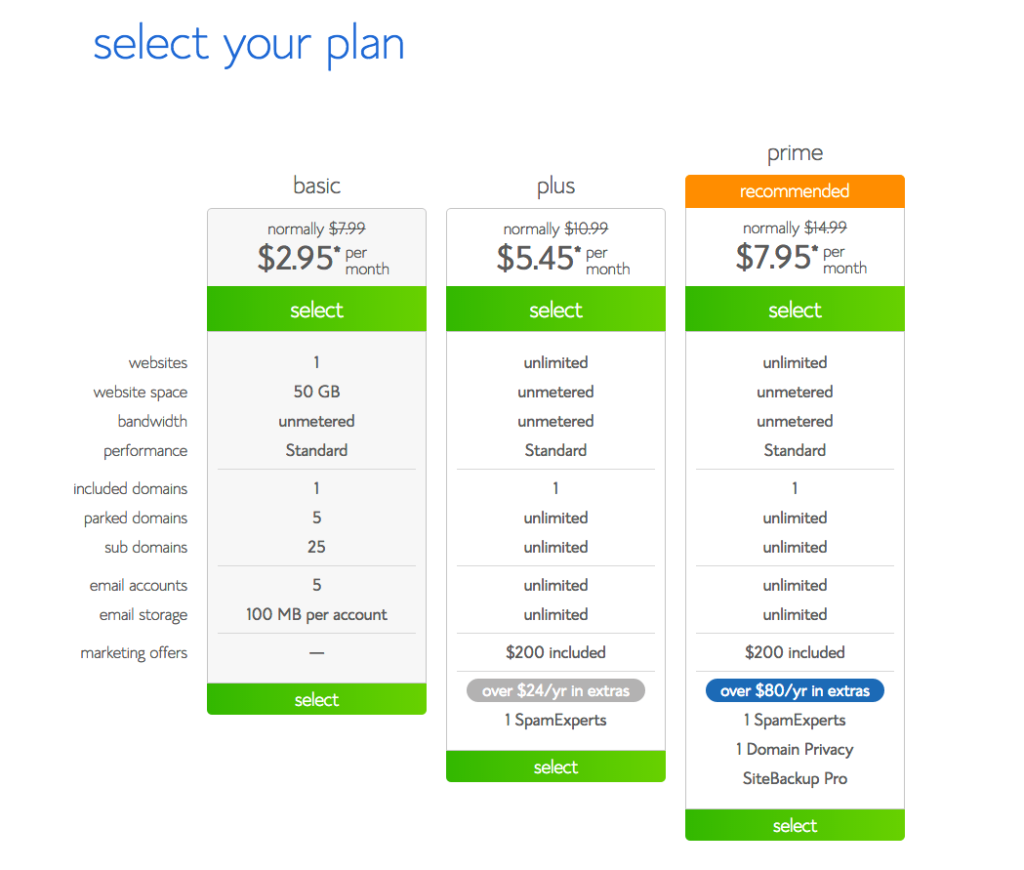
b) Choose your plan.
I recommend to choose the basic plan to begin with. Unless you have a solid growth plan, the basic is all you need to start off with. And you can upgrade as you grow.
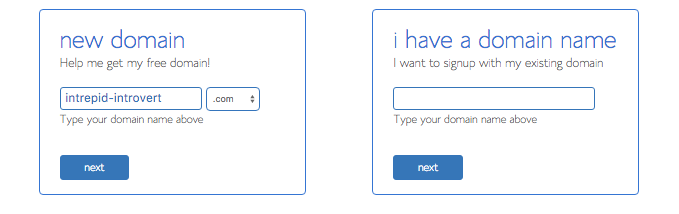
c) Type in a domain name you wish to use.
Try to use your brand/blog name from step #1 as the domain name.
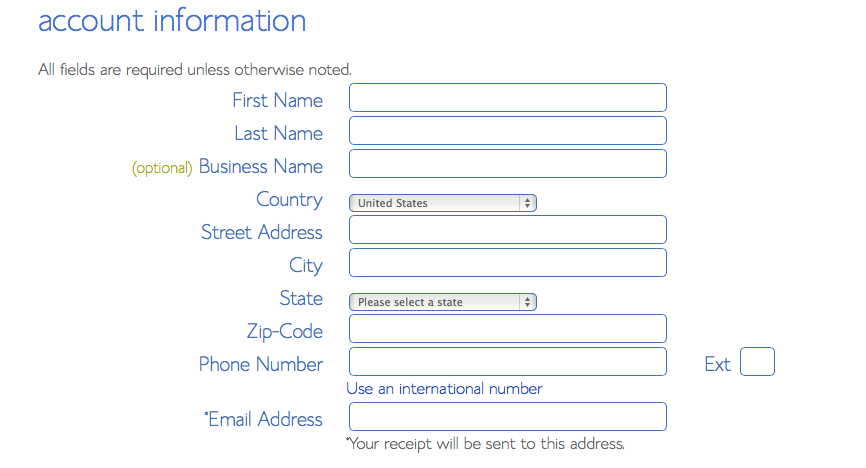
d) Account information and package options:
Enter all your relevant contact information:
I don’t use any of the other offerings, but I do recommend domain privacy protection.
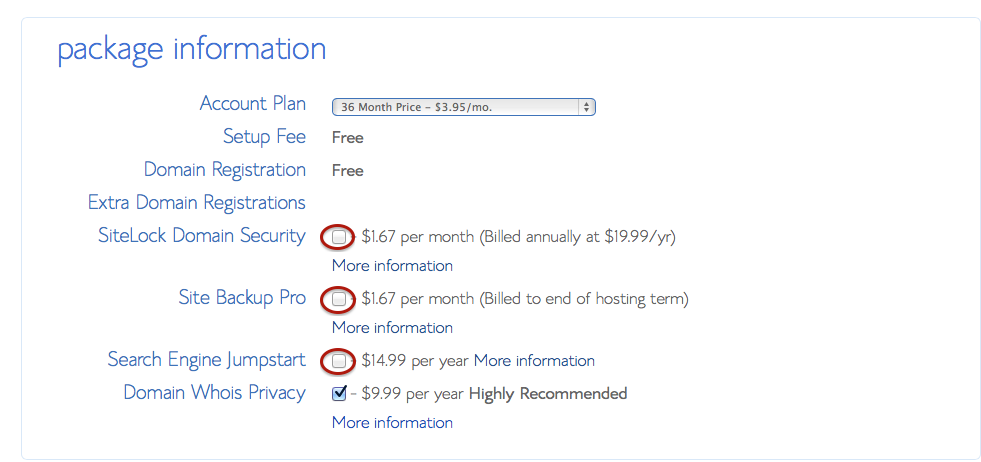
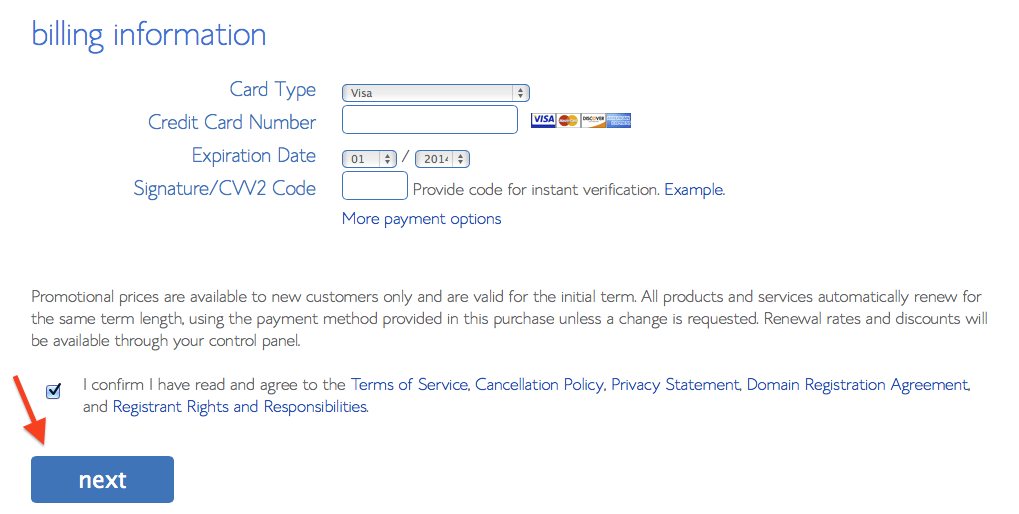
Now just enter in all your billing info:
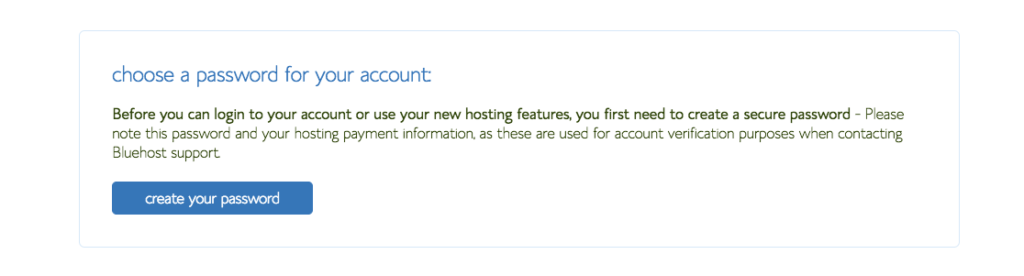
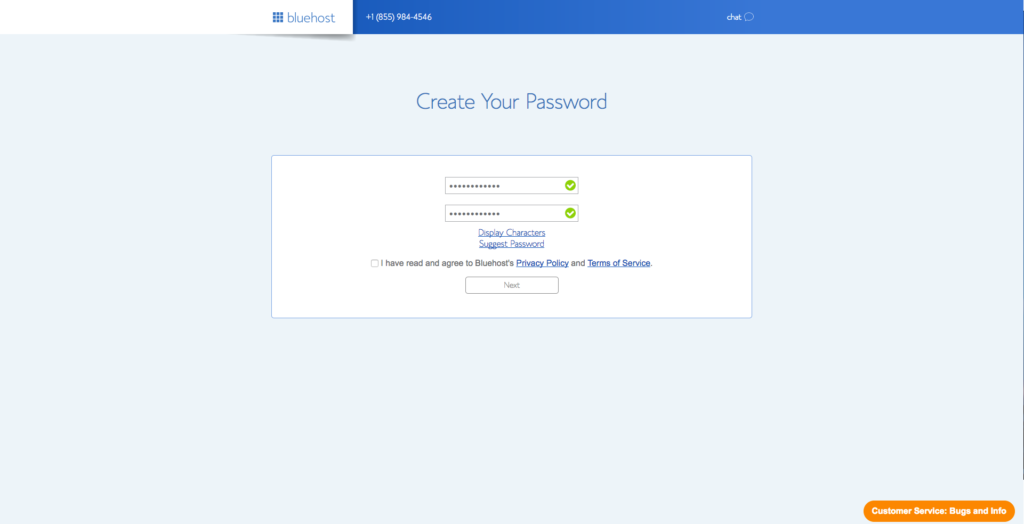
Step #3: Create a Password & Login
Now you want to create a password for your Bluehost account and officially login.
a) First off click the ‘create your password’ button.
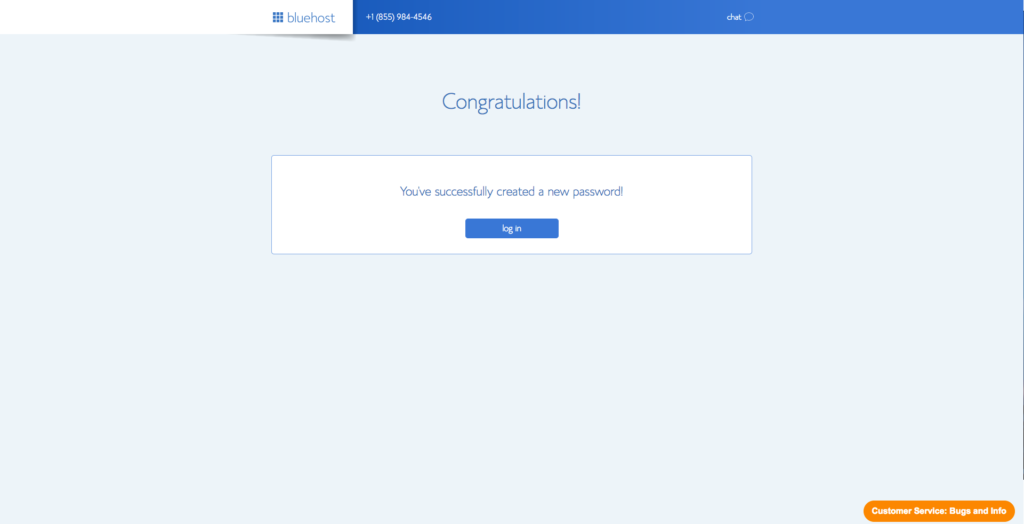
b) Enter your desired password, check the box, and click ‘next’.
c) Login to your new Bluehost account
Step #4: Auto Install of WordPress & Login
a) Auto Install of WordPress
Bluehost has now made it waaaay easier to install WordPress. Now, they actually auto install it for you (that is if you had signed up to Bluehost with the link I provided on Step 2- otherwise it will be a longer process 🙁 ).
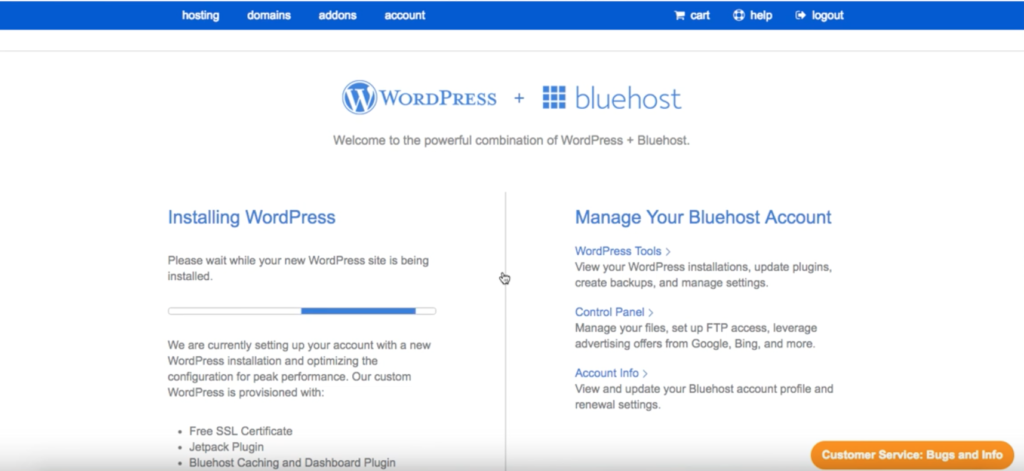
b) Login to Wordpress
Select the domain you just created and login to WordPress. From now on, it will be easier to login to WordPress by typing your domain into the address bar and adding a ‘/wp-admin’ at the end. So it will look like this: ‘www.yourdomain.com/wp-admin’.

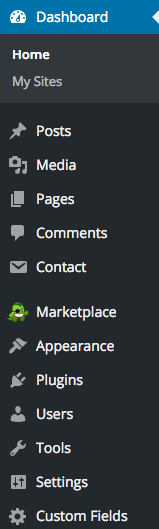
Once you’re logged in, go to your dashboard and familiarise yourself with what you can do. There are helpful Youtube tutorials to show you what every tab does.
The dashboard is your hub- it’s where you’ll write and post your blogs, change the themes, install plugins, edit the site… Everything! So be sure to take the time to get to know it.
Step #5 Themes:
This is the fun part! But choose your theme wisely as it can be hard to change your theme further down the track once your blog is fully set up with a lot of content. The good thing about WordPress.org is the large selection of free themes you can choose from. There’s also premium themes and many other sites which sell WordPress themes. A good site is Themeforest which have awesome themes from as low as $4.
At ThemeForest, in the navigation go to “WordPress” in the upper left section of the page. Then choose your theme type and begin exploring thousands of themes. After purchasing your theme from Themeforest, you will return to your WordPress dashboard and click “Appearance” > Themes > Upload a New Theme. Here you will upload the .zip file of the theme your just purchased.
To manage your themes, hover the ‘appearance’ tab and click ‘themes’.
Step #6 Plugins:
Plugins are the main reason I recommend using WordPress.org instead of WordPress.com. You don’t have access to any plugins with WordPress.com, meaning you are very limited with how you design your site and with the widgets you can use. Plugins allow you to be more personable and creative with your site and its design.
Here are a few of the plugins I use on my site and ones I recommend for you to install on your blog:
- AddToAny Share Buttons: Share buttons for your pages including AddToAny’s universal sharing button, Facebook, Twitter, Google+, Pinterest, WhatsApp and many more.
- Advanced Custom Fields: Customise WordPress with powerful, professional and intuitive fields
- Akismet: Protects your blog from spam. Trust me, you will need this!
- Contact Form 7: So readers can easily contact you via your site – The form is connected to your email account.
- Dynamic Widgets: So you can choose which pages your widgets will appear.
- Facebook All: Perfect if you have a Facebook fanpage. It shows your page as a widget and people can easily view and like your page and posts while still on your blog.
- Google Analytics Dashboard for WP: View your site analytics easily when in your dashboard. You can see the amount of visitors you have, where they come from, how long they stay etc.
- Google XML Sitemaps: Helps search engines rank your blog better.
- Image Banner Widget: Add banners and images to the sidebars of your site
- Insert Headers and Footers: To easily insert code or text into the header or footer of your site. Good for tracking and needed by some affiliate programs.
- Instagram Feed: To have your Instagram as a widget. Readers can see your Instagram photos and easily follow you without having to leave your website.
- Related Posts by Zemanta: Helps with readers’ engagement by including various related posts and the end of a post.
- Sumo Me or other list building plugins: For growing your email list (more about that in step #7).
- Ultimate Google Analytics: Enable Google Analytics on your blog. Has options to also track external links, mailto links and links to downloads on your own site.
- Use Any Font: Embed any font in your website.
- WP Canvas- Widgets: More options for widgets including an ‘About Me’ section.
- WPtouch Mobile Plugin: For a mobile friendly version of your site.
- Yoast SEO: The first true all-in-one SEO solution for WordPress, including on-page content analysis, XML sitemaps and much more.
Step #7: Social Media And Email Lists
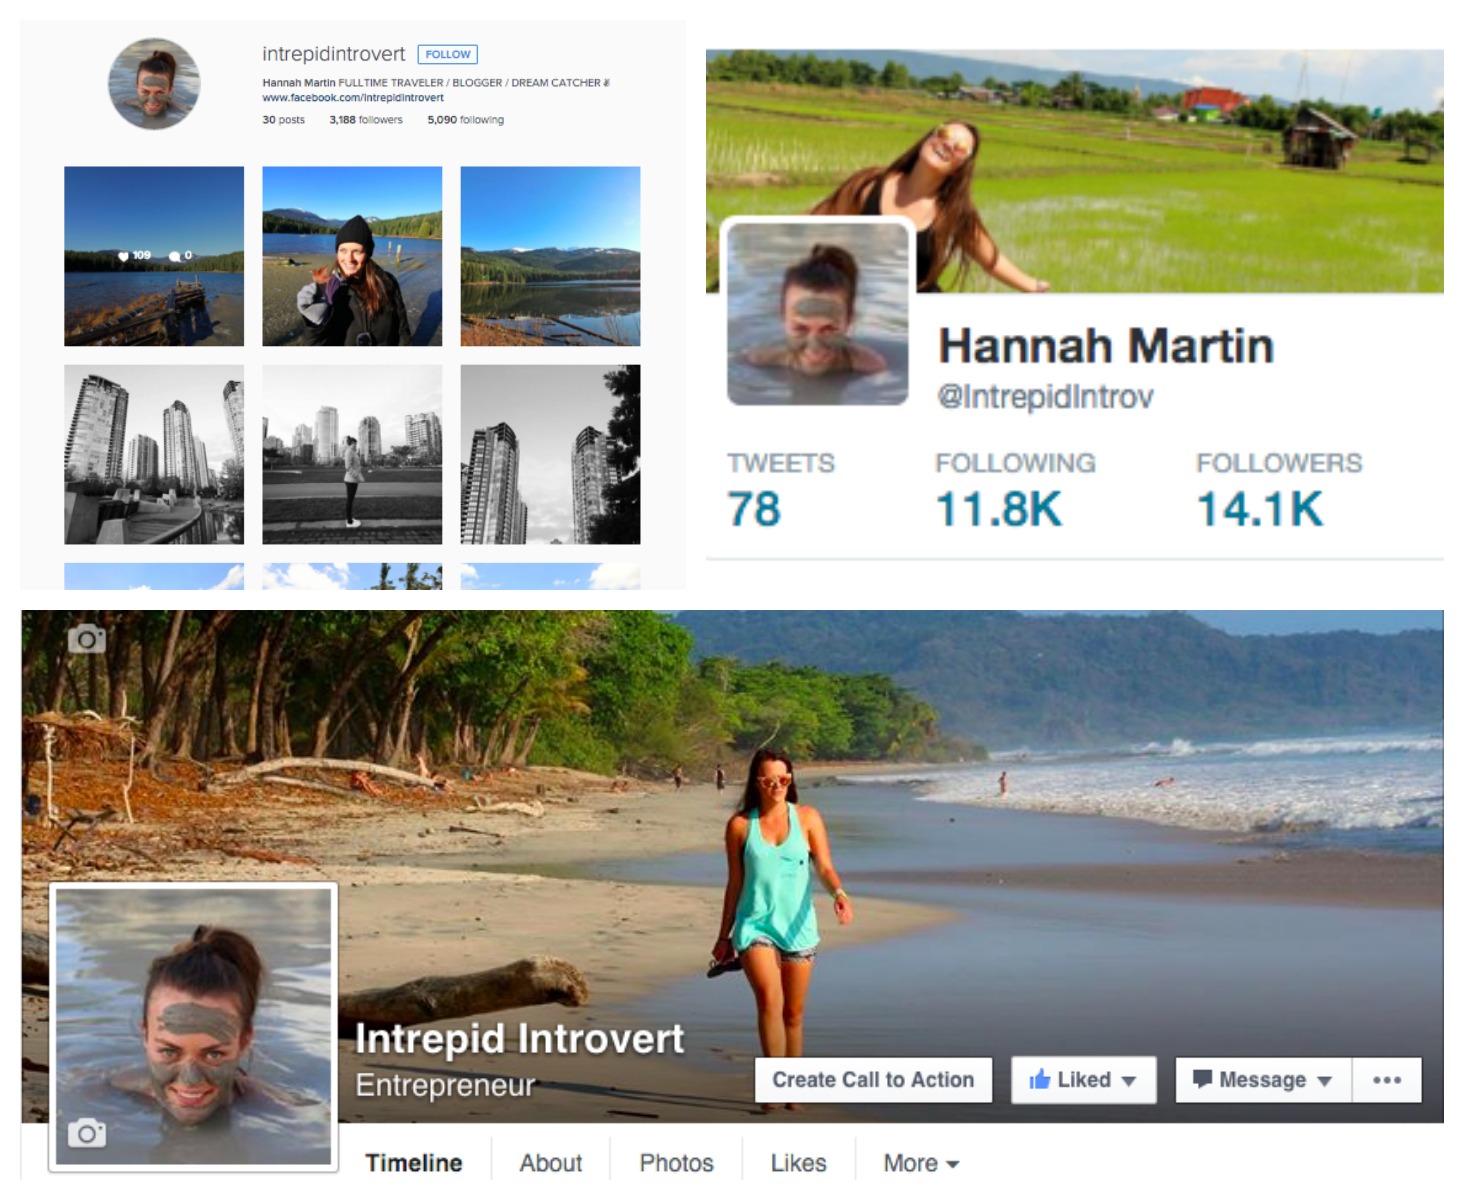
You want to create a social media loop to optimise your traffic to your blog. Create a Facebook, Twitter, Instagram, Youtube page all with the same brand/blog name. Share your content and drive the traffic from each platform to another platform.
Eg: Send people from your blog to your Facebook Page and vice versa.
Send people from Instagram to your Blog.
Send people from your Youtube to your Twitter.
Mix it up!
Also, think about creating an email list. This is especially important for those who wish to monetise their blog. I have a email subscriber form on my site which is linked to my GetResponse account. For an email list provider I do recommend GetResponse as it is affordable with several packages to choose from and it is easy to use.
So now all you need to do is write write write!
Goodluck!
Please note that affiliate links are used in this post. The services I have recommended throughout are the services I personally use and truly recommend to those wishing to start a blog of their own. No extra costs are incurred for you; the referral commission simply contributes to bringing you valuable content.
PIN IT:

3 Comments
Thanks for the major guide post! Any advice on how to transfer wp.com content to wp.org?
Some great advice here, especially the difference between .org and .com which has always confused us.
Also didn’t realise there were so many useful plugins.
These are in fact enormous ideas in regarding blogging. You have touched some pleasant factors here. Any way keep up wrinting.|